Welcome to 2020, where being quarantined at home due to the coronavirus is the “new normal.” Our homes used to be warm, inviting places to come back to after a long day’s work or to host parties with friends … now they feel more like the cages Joe Exotic used to hold his tigers, unless you are living that J-LO and A-Rod life (have you seen their yard?). Most of us are a bit more cooped up, but are still getting our needed doses of interaction thanks to the glorious technology called “Zoom.”
The all-powerful “Zoom” gives us much needed facetime with the people we love. It allows businesses to stay productive by still holding important meetings. And it gives us a reason to spruce up and put on “real person” clothes instead of devolving into modern-day cavemen and cavewomen, but remember, it’s ok to not be perfect right now.
For many of us, the new morning routine entails showering, brushing your teeth, and making breakfast, which consists of a cup of coffee and, if you’re lucky, a slice of last night’s pizza that you got delivered contact-free. You find the cleanest room in your house, dispose of any beer cans and wine bottles lying around, and get ready for your morning work meeting.
If you’re a real Zoom pro, you might even set your laptop on a stack of books, a pillow or your sleeping pet so you have a flattering camera angle – you don’t want the camera to add more weight than you’ve already gained while quarantined (Did you know one of those big cartons of Goldfish contains roughly 1500 Goldfish? Well, you do now). Finally, glancing around one last time to make sure everything looks appropriate, you sit down, take a sip of your coffee, and then… it’s showtime.
However, in the eyes of a cinematographer, you just made the biggest mistake ever. You put all this effort into making the talent (you) and your background look nice, but it doesn’t. Why? Shoddy lighting, of course!
Perhaps your room is too dark, and your only light source consists of the cold, blue light emanating from your laptop. Or maybe you’re near a window and the sun is screaming on your face along with any weird shadows from the tree outside. You could also be sitting on your couch re-watching Harry Potter for the 89th time, thinking that no one will notice because you’ve muted your TV, but every time the Patronus charm is used, it lights up the room like fireworks at Disney World. Woops.
So, now that I’ve informed you of your crimes, let’s talk about how to put you in the best light possible… literally.
For starters, find a brightly lit room, and by that, I mean a room with windows – natural light is your friend. However, the sun is only your friend if you know its location and how to use it. For our purposes, we’re going to assume it’s 9 AM in the United States during the spring, since time, season, and location are all important factors when it comes to the sun’s location. As the sun will be located almost directly east and moving south during this time, we want a corner room that has windows facing the west and north. Why? Because instead of having the sun beam harshly through our windows, we actually want the softer indirect light it provides. Ideally, all of the windows have shades so you can control the amount of light.
1. Lighting
Now that you have your room, let’s talk about how to position yourself and control your light. You will want to sit facing one of the windows – pick the one that will give you the best angle for your background. Go ahead and set up your laptop a few feet away from that window, then turn on the camera and take a look. Probably already looks pretty good…but we can make it better!

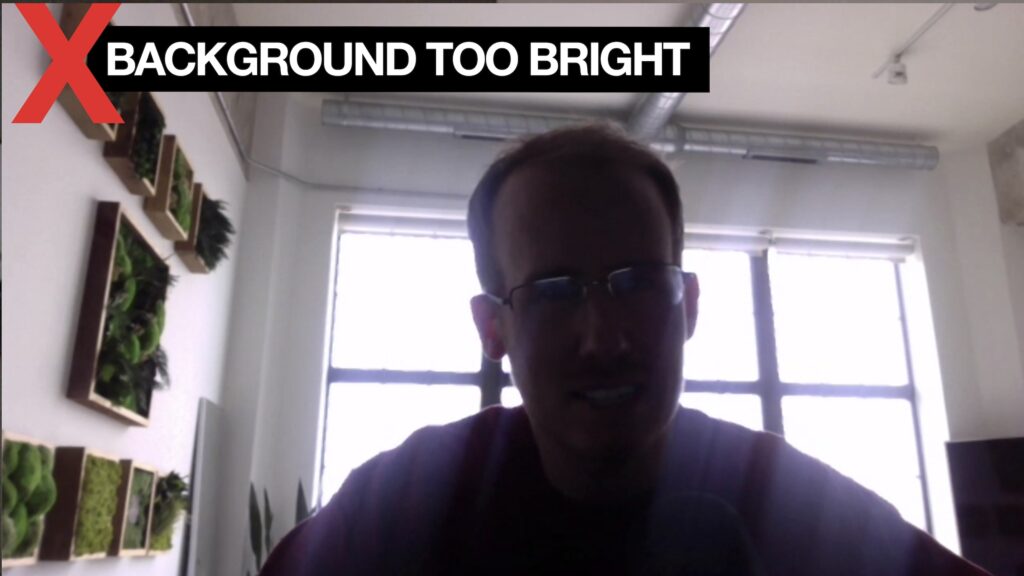
With lighting, ratios are important! And by ratios, I mean the brightness of your talent (you) versus the brightness of your background. If you find yourself too bright compared to your background, you can either back away from the window, or you can close the blinds a bit. If your background is too bright, close the shades of the windows behind you. You’ll want to be brighter than your background, but not to the point that you can’t see what’s behind you. A 2:1 ratio is nice, but feel free to play around.
You may think at this point, “Wow, this looks amazing!”, and it probably does! You should be proud, but not too proud. We aren’t done yet. We need to consider more about the light that’s glowing up your beautiful face. After all, you took the time to actually shower and get dressed, so might as well put a few more minutes into your setup to really impress your co-workers and then write a blog post of your own to share with them. Anyway, moving on.
So… your face. I’m sure it’s wonderful – let’s make it wonderful-er. We’ve already got this big, soft light wrapping all over your face like a big hug from Mother Nature herself. What we don’t have is contrast.
What you’ll want to do is rotate you and your laptop so that the light isn’t hitting you square in the face – about a 35 degree turn from the window is a good starting place. You may have to tweak the angle a bit since no 2 faces are alike (unless you’re a twin …or a clone). For instance, if you have a large nose – there’s nothing wrong with that – but you might reduce the angle a bit to minimize the shadow. It’s all about finding what works for you.
But wait, there’s more! Maybe you don’t only want to look good, but also express your emotions by how you’re lit. Want to look powerful? Bring in some light from behind you to give yourself some sharp edge lighting. Feeling conflicted? Angle and position yourself so only half of your face is lit. The power of lighting not only gives you the ability to stand out, it gives you a canvas to convey all sorts of emotions. By the time you master lighting, you may hope never to leave your home again!
2. Framing
While I somehow still have your attention, let’s talk beyond just lighting – let’s talk about framing. Most of you just plop yourselves right smack in the middle of the video. That’s not a bad starting point. It’s functional – your fellow Zoomers can see you clearly. However, it’s not the best use of space. Again, you’re trying to paint a compelling picture here.

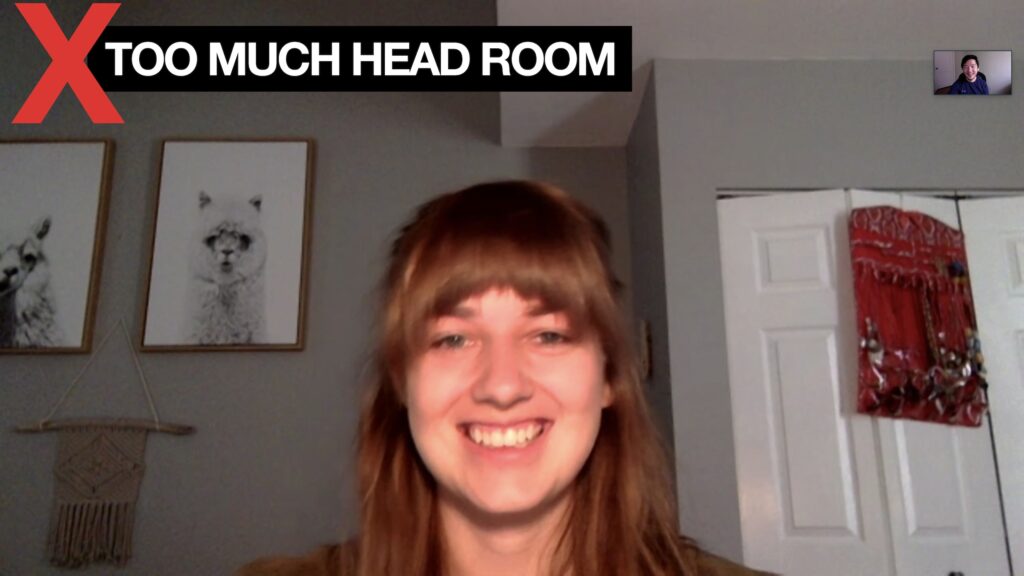
For more of a portrait look, stay centered, but reduce the amount of headroom (the distance from the top of your frame to the top of your head) until there’s about 5-10% of vertical space left. Also, make sure you’re far enough away from your camera so you can not only see your face, but also some of your shoulders and chest are showing. This way you can show off whatever outfit you’re wearing and prove you’re not wearing the same shirt everyday.

Maybe you don’t want to just show yourself, but also what’s behind you – perhaps it’s your incredible Lego collection or your recently remodeled kitchen. This is the perfect opportunity to display your color-coded bookshelf, so go ahead and do it! But remember, you’re still the star here. If your audience can’t see you clearly, it defeats the purpose of the meeting. (They’re here for you, even if they don’t know it.)
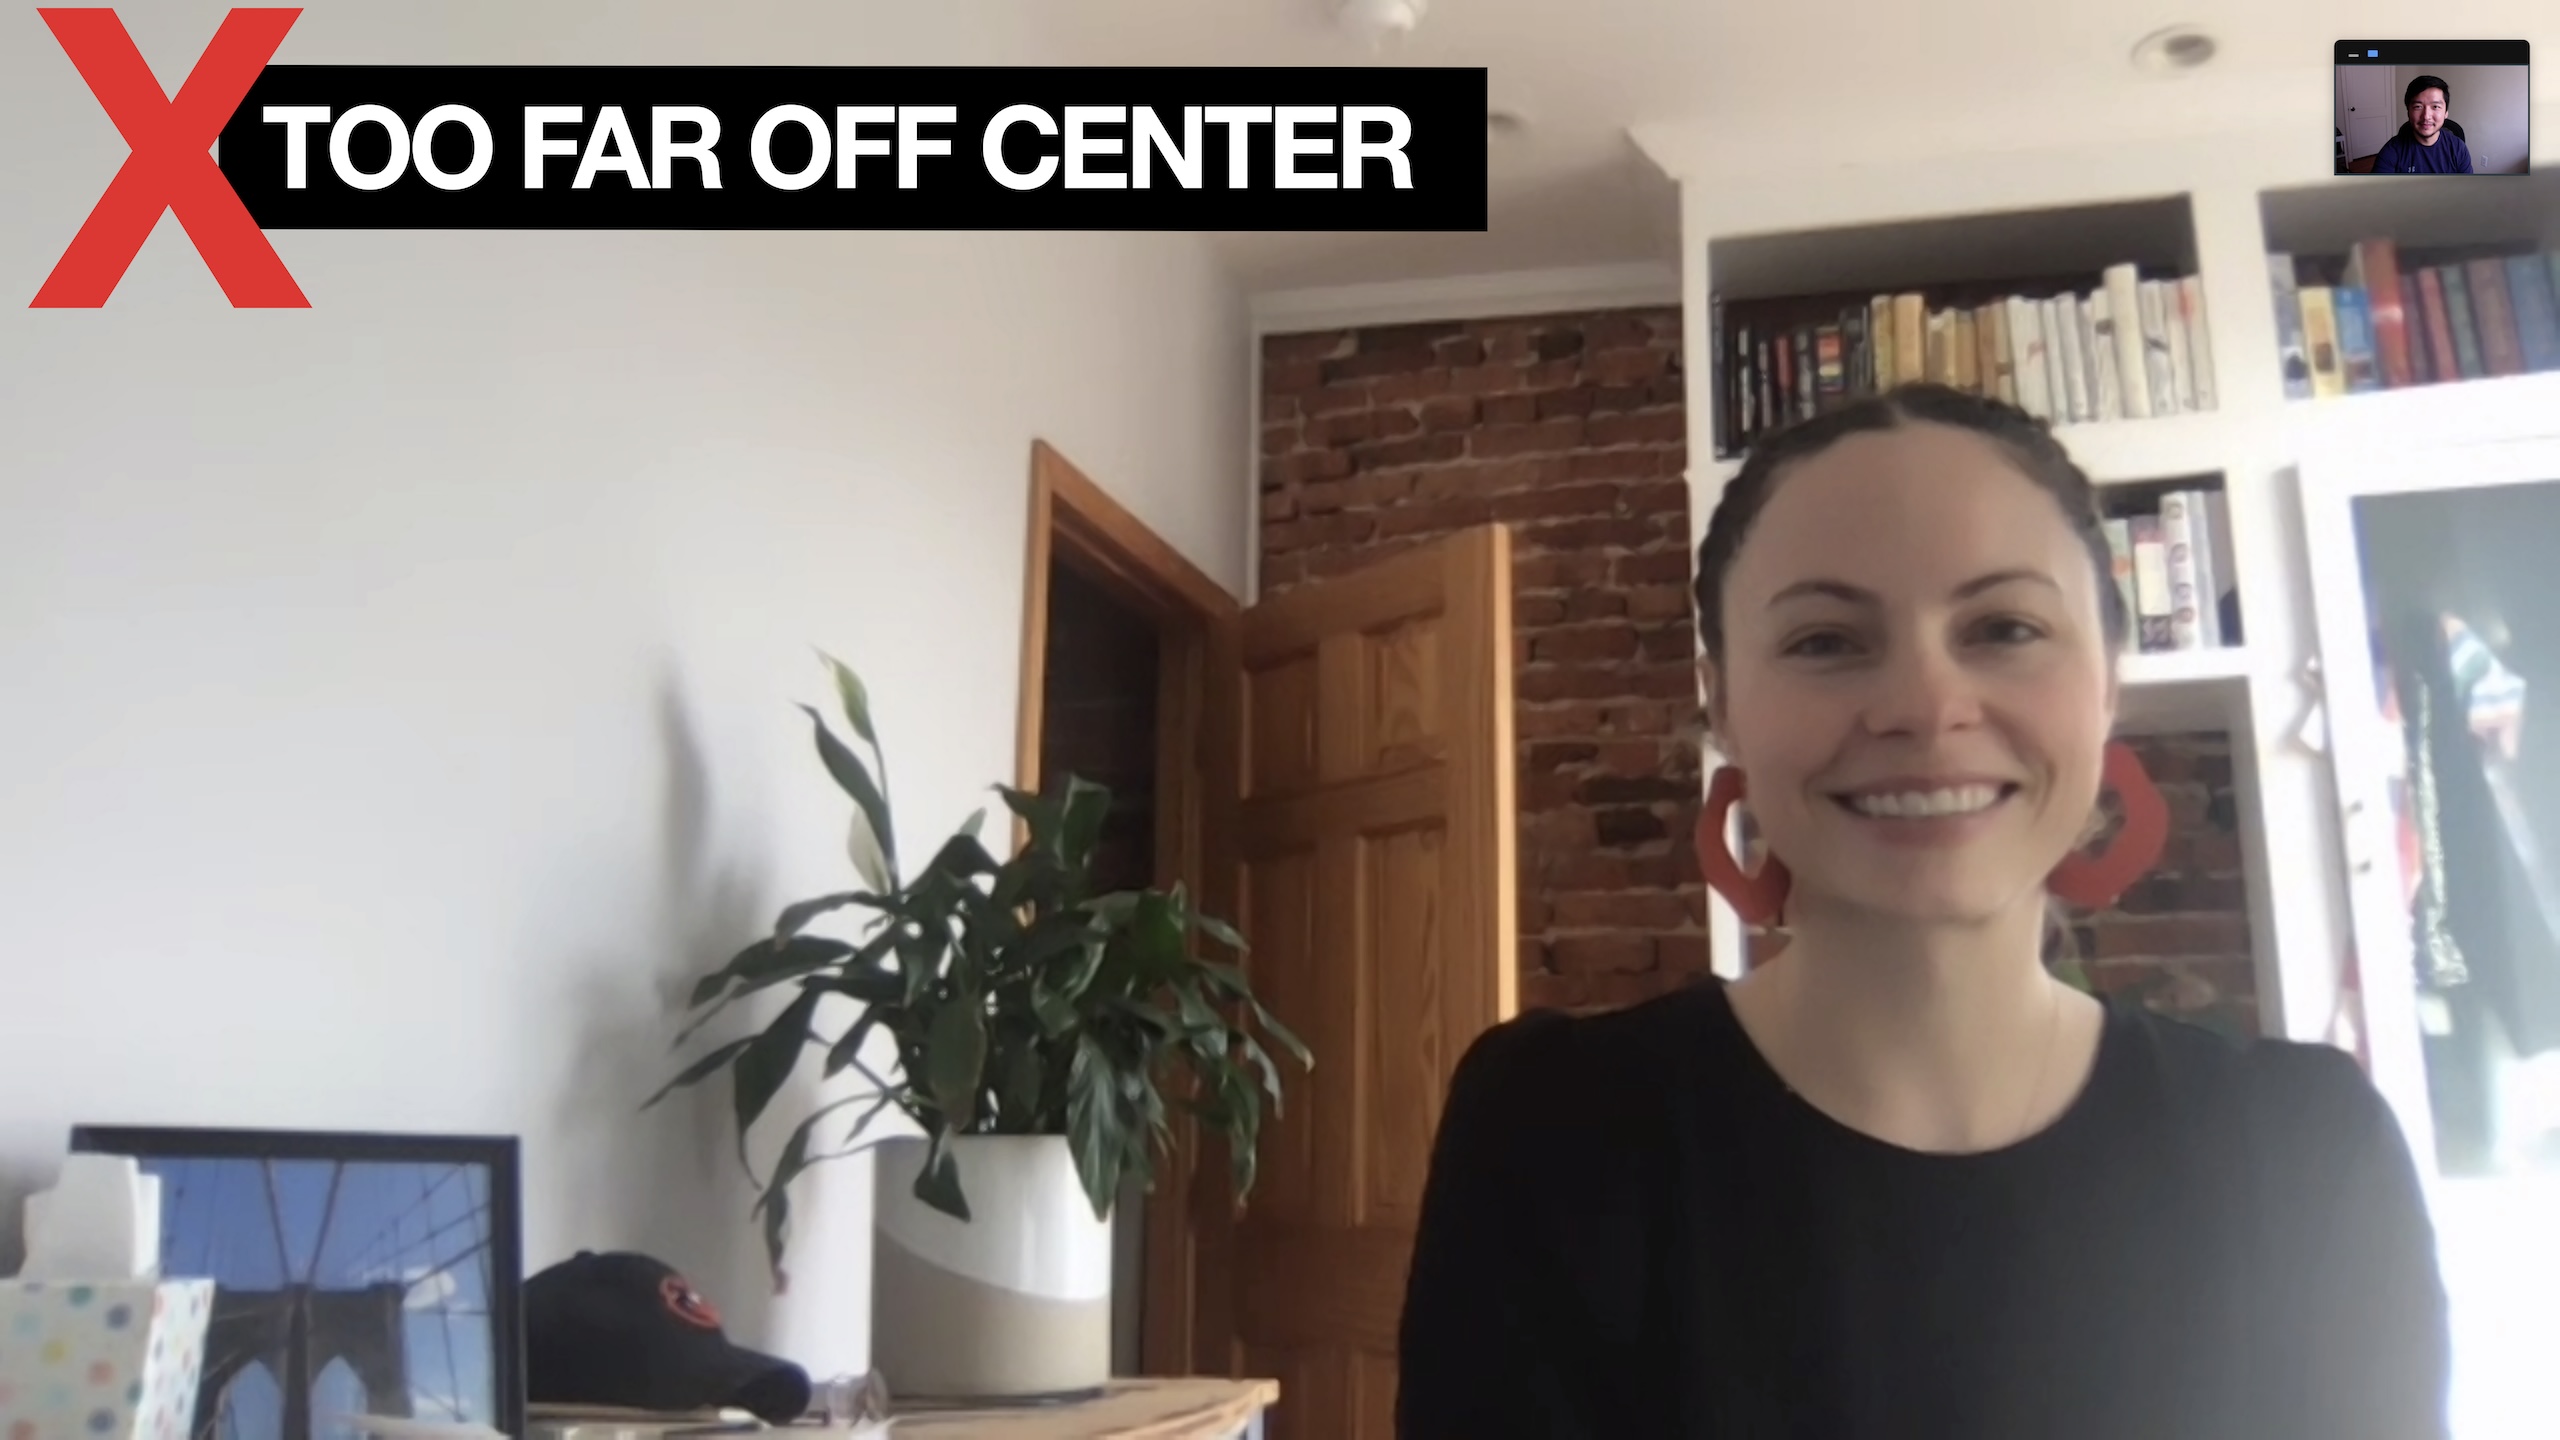
The rule of thumb for Zoom is to always be in the center – this is not the time to try to be artsy by putting yourself on the left or right side. This ensures you don’t accidentally sway outside of your frame, and it makes it easy for everyone else to see you. You want everyone to see your eyes rolling when that jerk Steve asks a question that was answered 2 minutes ago. (Sorry Steve, but really, could you not?) It is totally okay and encouraged to be the center of attention within your small box.

And there you have it, folks, some of our favorite video call tips. Use every meeting to express yourself without having to say a single word, but if you do have the floor and need to speak, just remember that no one really cares about your story. Let them see your passion, your frustration, your determination… all with the power of the sun.
By Scott Loraditch

